Using HTML, CSS, and JavaScript with a Tour
You can add your own HTML, CSS, and JavaScript to a tour on the Custom HTML screen.
To get to the screen, choose Tour > Custom HTML from the Tour Builder menu.
The Custom HTML screen
Advanced Feature
Custom HTML is an advanced feature intended for people with a good working knowledge of CSS, HTML, and JavaScript. MapsAlive does not validate the code you type on the Custom HTML screen. If there are errors, your tour may not display or work correctly. Technical support does not cover this feature. If your tour does not work correctly after you have added code on the Custom HTML screen, identify the problem by backing out your changes one at a time until the tour works again.
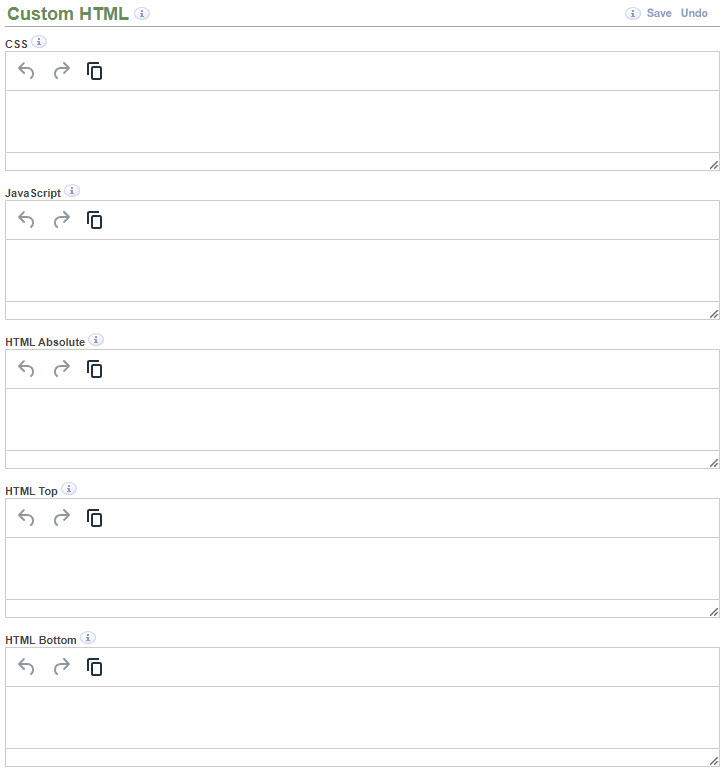
The Custom HTML screen contains the text fields shown in the screenshot below. The HTML Top and HTML Bottom fields only appear for a Classic tour. They do not appear for a Flex Map tour.
Each field is explained in the sections that follow.
CSS
Use the CSS field to include any CSS that you want to use with your tour. Typically, the CSS you type here would be used to style HTML that you put in the HTML Absolute, HTML Top, or HTML Bottom fields.
If you want to style HTML Top or HTML Bottom, specify attributes for #maCustomHtmlTop or #maCustomHtmlBottom respectively. If you want to style HTML Absolute, specify attributes for #maCustomHtmlAbsolute as shown in the example below.
#maCustomHtmlAbsolute
{
   left: calc(100% - 100px);
   top: calc(100% - 160px);
   background-color: white;
   border: solid 3px green;
}
The CSS above positions the maCustomHtmlAbsolute element to the lower right corner of the tour and shifts it left by 100px and up by 160px. By using 100% in the calc function, the element stays positioned in the corner as the browser grows or shrinks.
Using CSS to Override MapsAlive Styles
MapsAlive uses CSS to control the appearance of your tours. If you are experienced coding CSS, you can override the styling of certain HTML elements of a tour page to achieve the look you desire.
Warning
MapsAlive depends on certain styling that allows tours to be responsive. If you override CSS styles that affect responsiveness, you could adversely alter the behavior or the tour as it resizes to accommodate the available screen space. However, if you limit your styling changes to things like colors and fonts, you should be okay.
You can use your browser’s developer tools to see the names of the Ids and classes that MapsAlive uses for the many elements of a tour. In most cases, elements have an Id that is unique to an individual tour within a containing web page and a class name that is generic for all tours on the page.
For example, the title bar element for tour #83634 would have a unique Id of ma-1-83634-TitleBar and a class of maTitleBar. Fortunately, you don't need to code the tour number into your CSS. If you code the style as #maTitleBar on the Custom HTML screen, MapsAlive will automatically convert it to ma-1-83634-TitleBar. MapsAlive does not convert class names like .maTitleBar since they are not unique to a tour. Thus, if you want the style to apply to multiple tours on the same page, code it as .maTitleBar.
Within a tour, each page uses the same Ids for its elements. For example, the element for every page that uses a tiled layout has a tour-specific Id such as ma-1-83634-HotpotText, and a class such as maHotspotText (for a popup layout the Id would be ma-1-83634-PopupText with class maPopupText). If your CSS uses just the Id or the class name, the CSS will affect all pages in the tour; however, if you want to style an element for a specific page, you can also specify the maPage class that belongs to the maTour tag to indicate the current page. For example, to make the text italic only on page 3, you could write the code below that styles the hotspot text element, but only when the maPage-3 class is present.
.maPage-3 #maHotspotText
{
   font-style:italic;
}
HTML
The Custom HTML screen shows three HTML fields for Classic tours and one for Flex Map tours. This is because only Classic tours allow top and bottom HTML.
HTML Absolute
Use the HTML Absolute field to include any HTML that you want the browser to display on top of your tour. By default, any HTML entered in this field is absolute positioned relative to the top left corner of the tour and displays on top of the tour. To position your content differently, you can specify the top and left position in the CSS field by coding a #maCustomHtmlAbsolute class as was shown earlier.
The HTML Absolute field is useful when you want to display options, a legend, or a navigation mechanism that appears to float over your tour. For example, you could display checkboxes that allow the user to show or hide markers on the map.
The CSS you use for absolute positioning should take into consideration that the size of the tour may change to fit the browser or device. To ensure that the absolute positioned elements always appear in the right place, avoid using only px units when specifying the top and left positions and instead use either %, or a combination of px and % using the CSS calc function as was shown earlier.
HTML Top
Use the HTML Top field to include any HTML that you want the browser to render above a Classic tour. You might use this HTML to display a header, graphic, or menu above your tour.
HTML Bottom
Use the HTML Bottom field to include any HTML that you want the browser to render below a Classic tour. You might use this field to display a footer or menu below your tour.
TOUR_INSTANCE macro
If your custom HTML includes event handlers such as onmouseover, onmouseout, or onclick, you may encounter situations where you want to pass a tour's instance identifier to the JavaScript function that handles the event so that it can make decisions based on which tour instance triggered the event. You can use the TOUR_INSTANCE macro to do this.
<button onclick="onButtonClicked('TOUR_INSTANCE')">Click Me</button>
When the tour loads, MapsAlive will automatically replace TOUR_INSTANCE with the tour instance identifier. If the identifier is not set, the replacement value will be blank.
JavaScript
Use the JavaScript field to code JavaScript that you want to use with your tour.
Errors in your JavaScript can prevent the tour from running or from behaving properly. When coding and testing your own JavaScript, always keeps the browser's Developer Console window open so that you can see any errors that occur. Also, during development, use the API's reportErrors method so that errors will get reported while in Tour Preview.
You can use the JavaScript field to code API callback functions to be called when an event has occurred such as when your tour has finished loading or when results from a Live Data request have arrived.
You can also code functions that get called when a user performs a certain action like touching a marker. You specify which functions are called for which marker actions (click, mouseover, or mouseout) on the Marker Actions screen.
If your tour is embedded in a web page and requires a lot of JavaScript, consider putting the code in an external script file instead of in the JavaScript field. Or, if some of your JavaScript is specific to the tour and other JavaScript is more general purpose, you can put the tour-specific logic in the JavaScript field and put the general-purpose logic in a file. See an example of using external files for JavaScript and CSS.
Custom Menu Example
The tour below uses CSS, JavaScript, and HTML to display a menu bar across the top of the tour.

Below is the HTML, CSS, and JavaScript code used to create the custom menu bar in the tour above.
<div class="navbar">
   <div id="navbar-item-1" class="navbar-item" onclick="goToPage(1);"></div>
   <div id="navbar-item-2" class="navbar-item" onclick="goToPage(2);"></div>
   <div id="navbar-item-3" class="navbar-item" onclick="goToPage(3);"></div>
   <div id="navbar-item-4" class="navbar-item" onclick="goToPage(4);"></div>
</div>
.navbar {
   display:flex;
   cursor:pointer;
   font-family: helvetica;
   margin: 6px 0;
}

.navbar-item {
   padding: 4px;
   border: solid 1px green;
   margin-right: 8px;
}

.navbar-item:hover {
   background-color: #ccc;
}

.navbar-item.selected {
   color: white;
   background-color: #3d5056;
}
function onEventTourLoaded(event) {
   // Assign each page's name to its menu item.
   for (const page of event.api.pages)
      getMenuItem(page.number).innerHTML = page.name;
}

function onEventPageLoaded(event) {
   // Deselect all the menu items.
   for (const page of event.api.pages)
      getMenuItem(page.number).classList.remove('selected');
   // Show the current page as selected.
   getMenuItem(event.page.number).classList.add('selected');
}

function getMenuItem(pageNumber) {
   // Get the menu item element for the page.
   let id = `navbar-item-${pageNumber}`;
   let e = document.getElementById(id);
   return e;
}

function goToPage(pageNumber) {
   MapsAlive.getApi().goToPage(pageNumber);
}