Symbol Markers
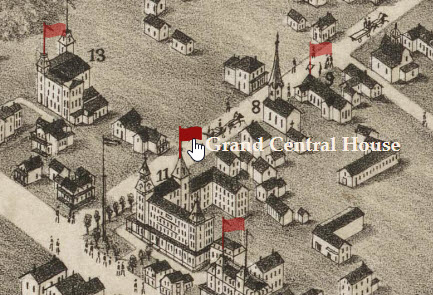
A symbol marker is a small image, usually an icon, like an arrow, dot, or star, but you can use any image in a symbol marker. Below is an example of a symbol marker that uses a flag icon as its image. The flag's normal appearance is semi-transparent, but when you mouse over a flag, it becomes opaque and a tooltip displays.
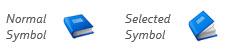
A symbol marker will have an animated effect if the selected symbol is different from the normal symbol. Using the two symbol images below, the book marker will appear to open when you mouse over it.
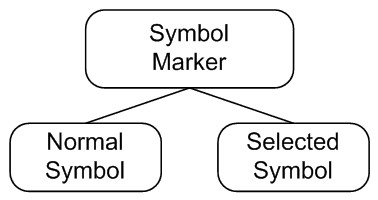
You can use jpeg, gif, or png files as symbols. A symbol marker has two images associated with it as shown in the figure below. One image is for the marker’s normal appearance and the other is for its selected appearance.
Working with Symbol Markers
To create a symbol marker you first upload one image for the symbol's normal appearance and another image for the symbol's selected appearance. Then you create a symbol marker using the two images.
How to upload symbols to use for markers
- Choose New > Resource > Symbol from the Tour Builder menu
- On the Add Symbol screen:
- Type a symbol name
- Click Choose File
- Select the symbol file from your computer
- Click Open on the dialog
- Click Load
Once you upload a symbol into your account it will be available in the symbol dropdown lists on the Edit Marker screen. Remember that to use a symbol as a marker you have to create a marker that uses your new symbol.
How to create a symbol marker
- Choose New > Resource > Marker from the Tour Builder menu
- On the Edit Marker screen:
- Choose a marker name
- Choose Symbol from the Marker Type dropdown
- Choose a normal symbol from the Normal Symbol dropdown
- Choose a selected symbol from the Selected Symbol dropdown
Your new marker is now ready to use for a hotspot. It will appear in the Marker dropdown the next time you go to the Edit Hotspot Content screen.
How to edit a symbol image
- Choose Library > Symbols in the Tour Builder menu
- On the Symbol Library screen:
- Click the name or image of the symbol whose image you want to edit
How to replace a symbol image
- Choose Library > Symbols in the Tour Builder menu
- On the Symbol Library screen:
- Click the name or image of the symbol whose image you want to replace
- Upload a new image
When you replace a symbol image, all markers that use that symbol will be updated automatically.
How to create a symbol marker that does not change appearance
Choose the same symbol from the Normal Symbol and Selected Symbol dropdowns, or choose No Symbol from the Selected Symbol dropdown on the Edit Marker screen.
How to create a symbol marker that only appears when the hotspot is selected
If you don’t want to clutter your map with symbols, but you want a symbol to appear when the mouse moves over a hotspot, choose No Symbol from the Normal Symbol dropdown on the Edit Marker screen.
How to set the anchor location of a symbol marker
The anchor location defines the point around which a marker will rotate. By default, a symbol marker is anchored in the center of the symbol, but you can change the anchor location. For example, if you have a pin marker you might want the anchor location to be the tip of the pin. That way, if you rotate the pin marker on the map, it will rotate around the tip of the pin rather than the center.
- Choose Library > Markers from the Tour Builder menu
- On the Marker Library screen:
- Click the name or image of the marker you want to edit
- On the Edit Marker screen:
- Choose Off Center from the Anchor Location dropdown
- Enter values for X and Y
How to see which markers are using a symbol
- Choose Library > Symbols from the Tour Builder menu
- On the Symbol Library screen:
- Click Show Details View
- The details view displays the number of uses to the left of the symbol preview, or "Not used"
- Click the link to see which markers are using the symbol
How to see all the symbols in your account
- Choose Library > Symbols in the Tour Builder menu
To learn more, see Working with Markers.
Tips and Techniques
- To use symbol images that contain transparent areas, upload gif or png image files. Jpeg images do not support transparency. Only one color in a gif image can be transparent. For best results, use png images for your symbols.
- You can upload any size symbol images. Whatever size image you upload is the size the symbol marker will be when placed on a map.